Creating an app is not an easy task especially if you don’t have technical background and knowledge of coding. Most startups and new business owners find it difficult to launch a fully functional app in the app marketplace. So, Appstylo provides you the opportunity to create an app without coding.
You can make an app with complete customization. For instance, if you want to create the homepage of your app using grid navigation, then you can easily do it using Appstylo. All you need to do is drag and drop, then customize according to your business needs and requirements. In this article, we’ll see how to implement grid navigation when creating an app using Appstylo.
Steps to Implement Grid Navigation
Before moving on to the steps please make sure to sign up and log in to your account on Appstylo.
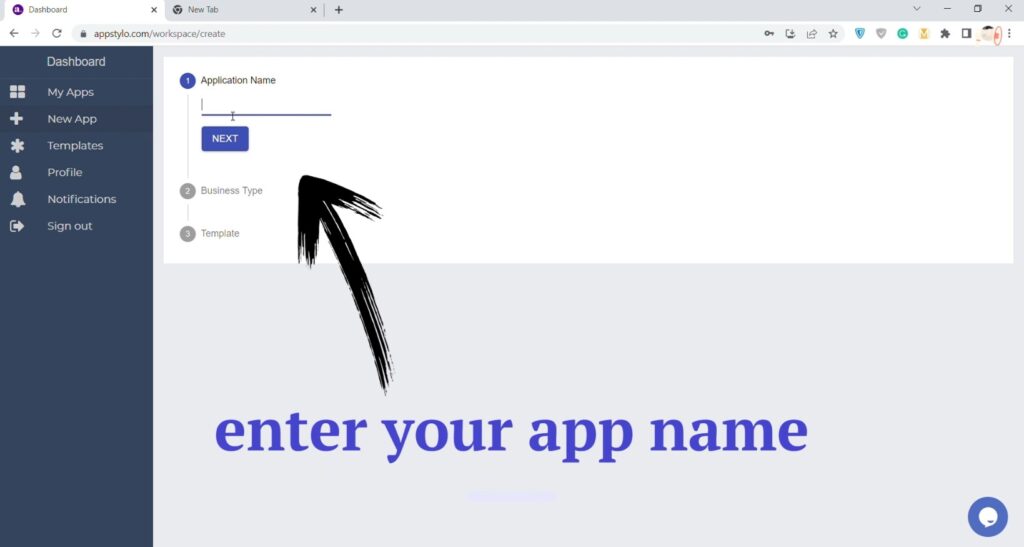
- In the first step, click on the “+” icon to create your first app.
- Now enter your “Application Name” and then click the Next button. You can write any name you want for your application. For instance, Cake Bakes.
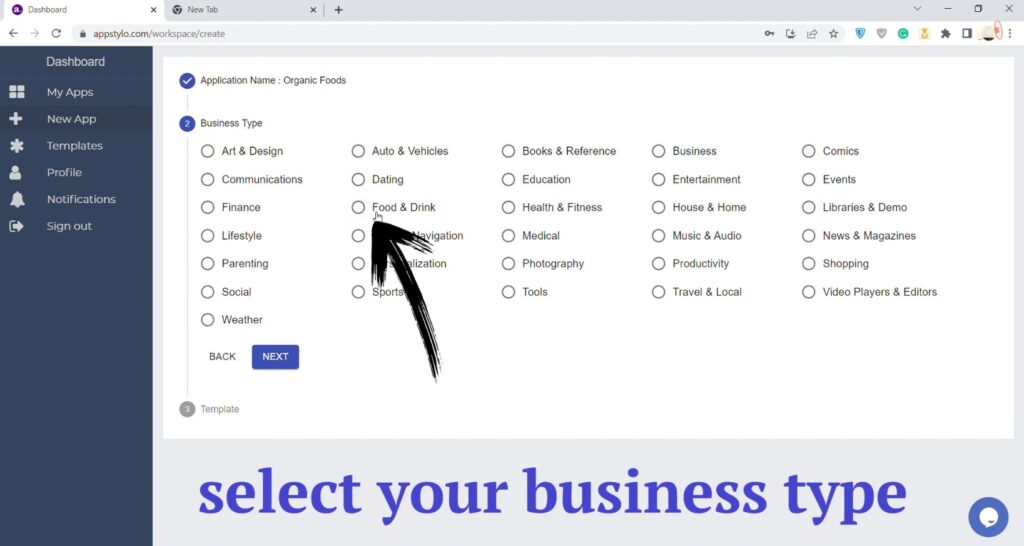
- Then select your “Business Type” and click on Next. You can select the business type according to your app and business, like Food & Drink.
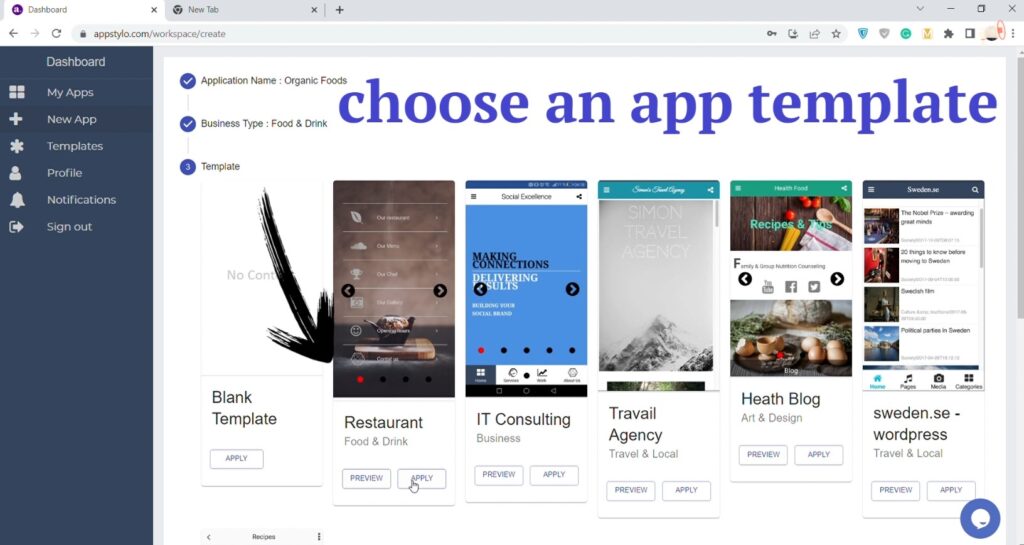
- Choose an “app template” that you like by clicking on the Apply button. You can also get a preview. If you own a restaurant, then you can choose a restaurant-related template.
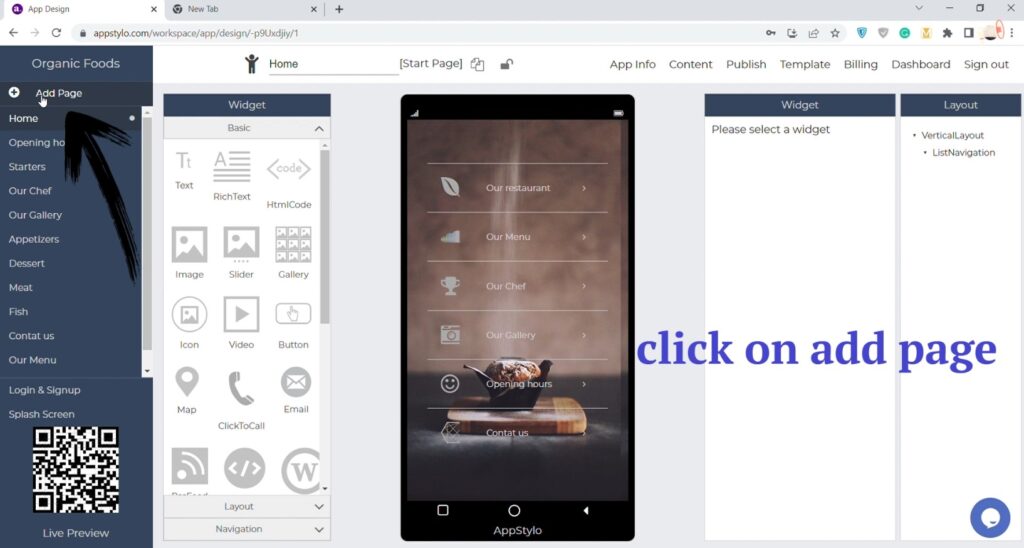
- Now click on “Add Page” to create a new page.
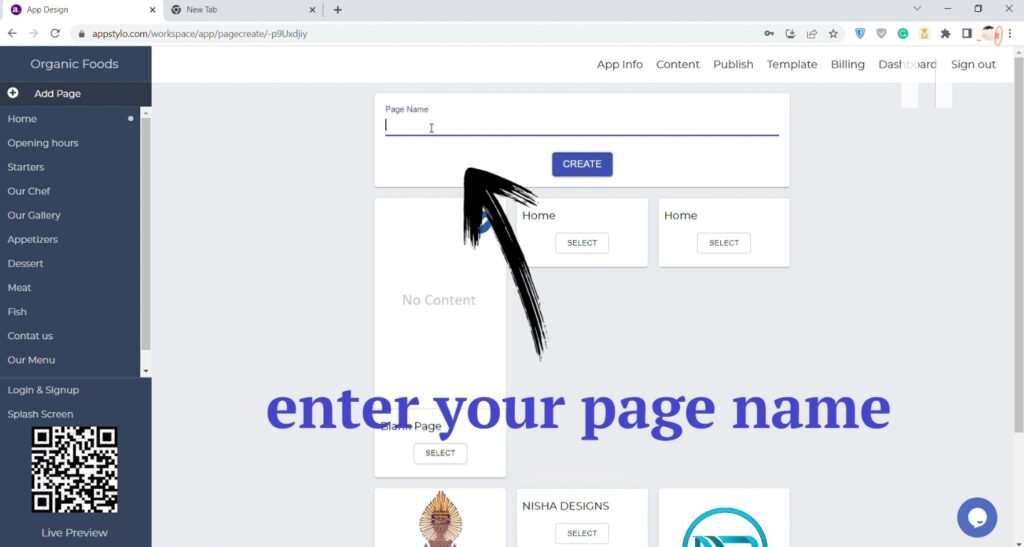
- Then enter the “Page Name” that you want for this page and click on Create. Like Cake Bakes etc.
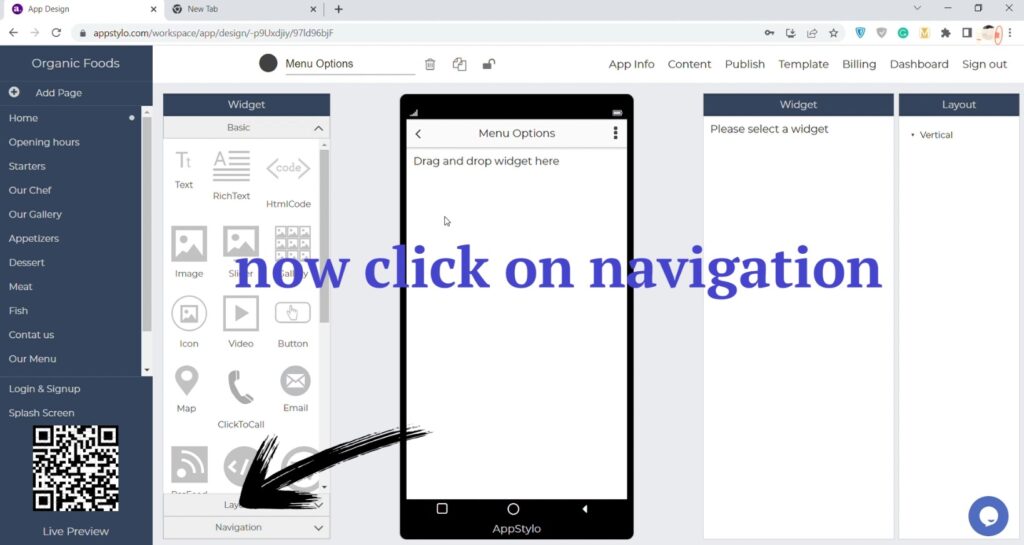
- In the next step click on “Navigation”.
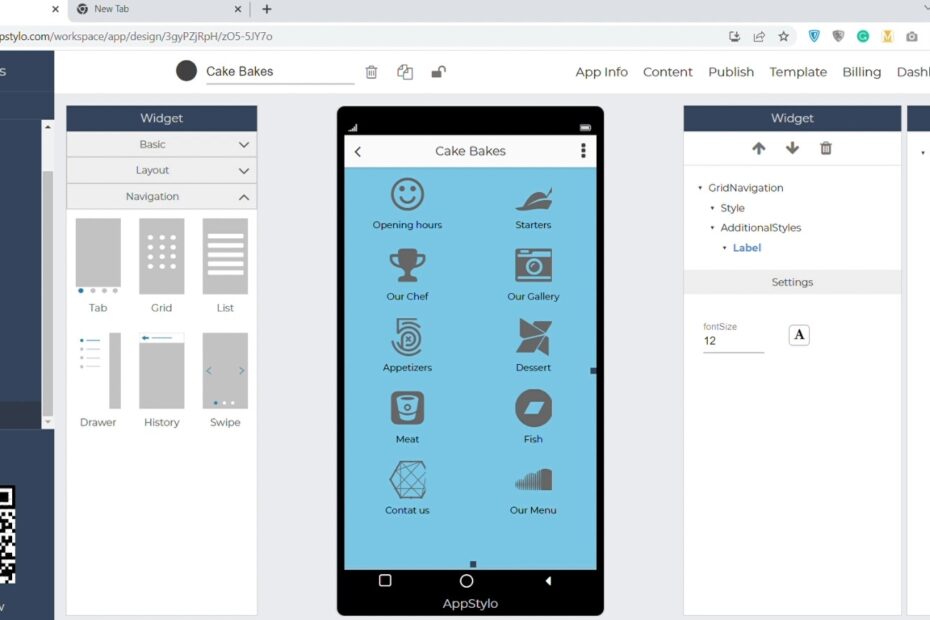
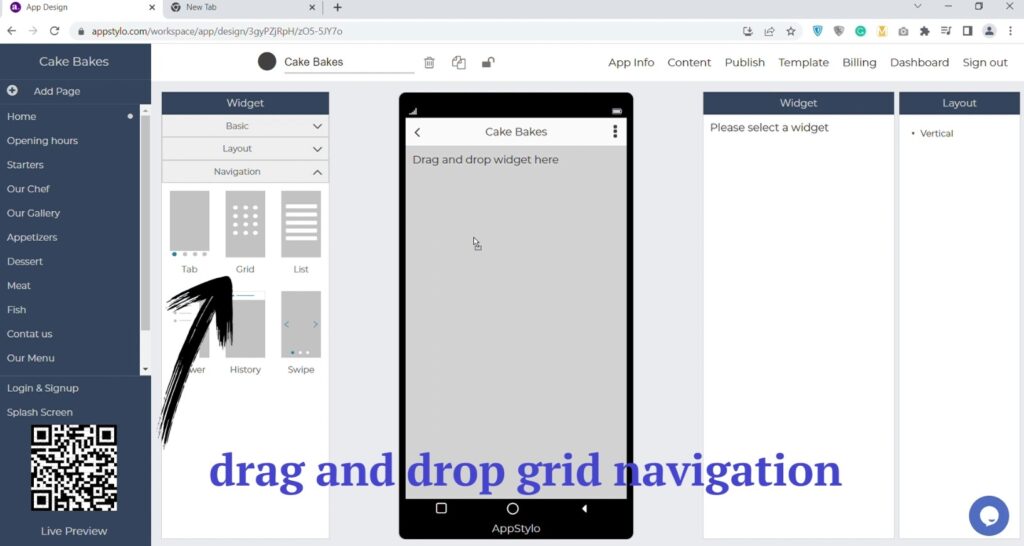
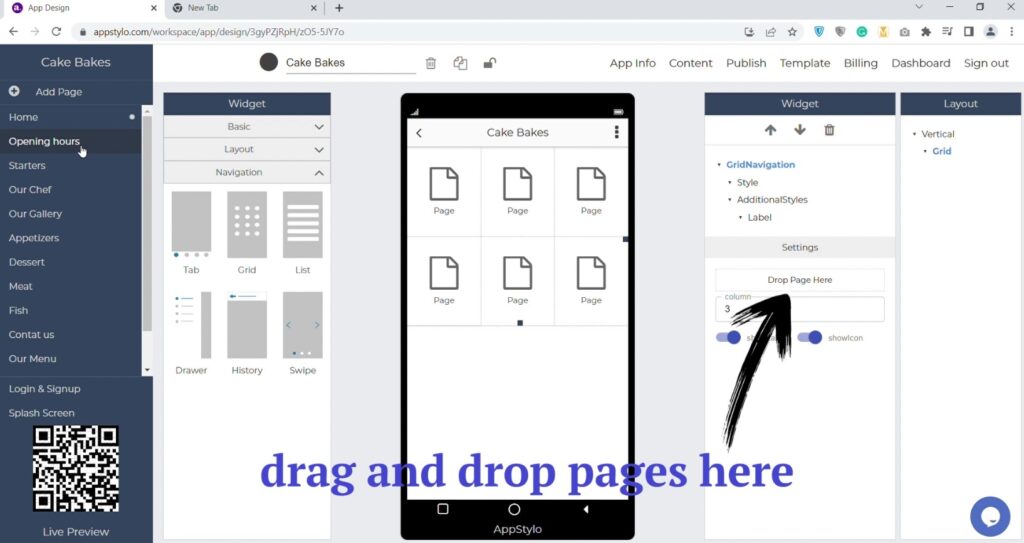
- Drag and drop “Grid Navigation” on the app screen.
- Now you have to “drag and drop pages” here on the right side under settings. You can add as many pages as you like.
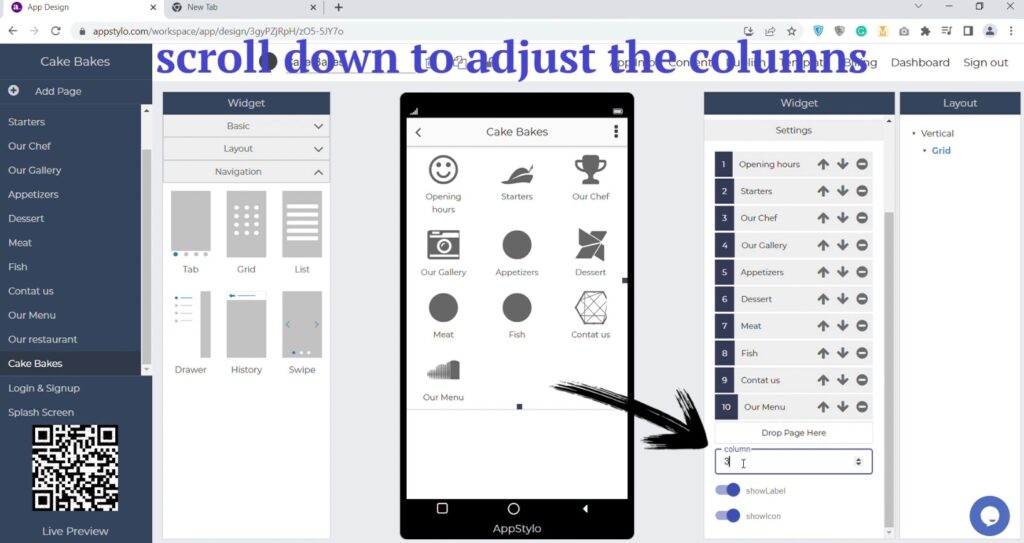
- Scroll down and you’ll see the “column” option below where you can choose the number of columns you want (e.g., 2) in the grid.
- To change the icon of the page, “click on page” and then beside the page name at the top to “select a new icon”.
- Now click on “Vertical”, and then on “Style” to choose the background color.

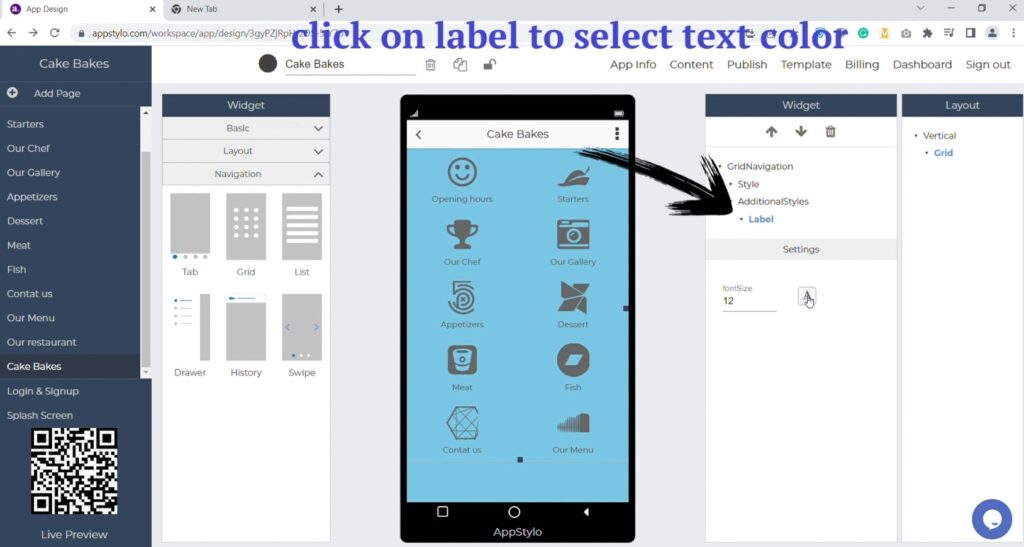
- You can also change the text color by “clicking on Label”.
Now your grid navigation is complete and ready for use. You can make all the changes you want according to your requirements and add other elements as well.