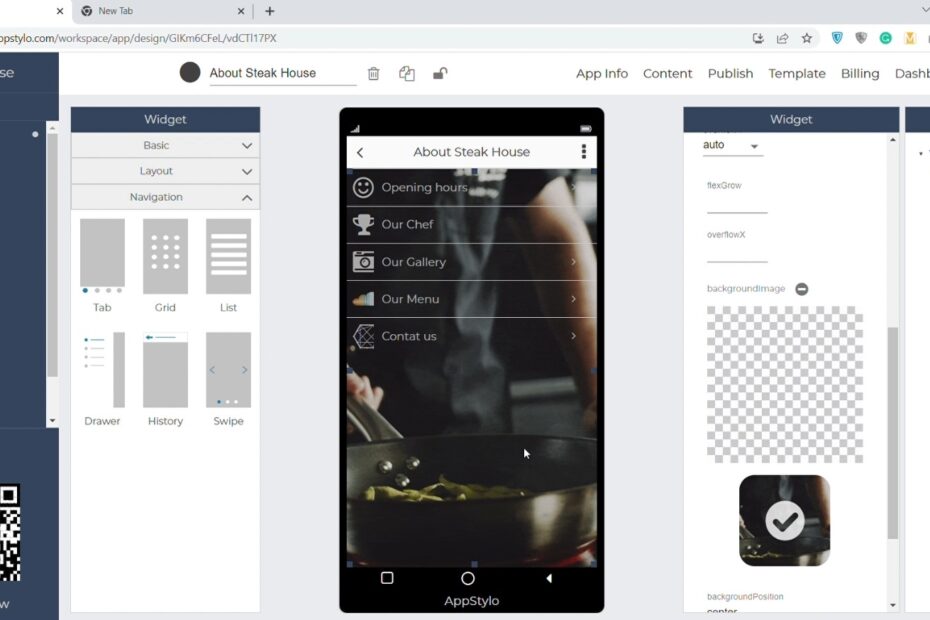
Creating an app is now a necessity for a business or startup to flourish. However, it is not an easy task especially if you don’t know how to code. However, you can still create an app using a no-code app builder like Appstylo. Using this tool, you can create fully custom apps like adding list navigation and widgets you like. All this without writing a single line of code.
No need to hire an agency or a freelancer when you can make an app easily just by drag and drop with complete customization. A few years back no one would have thought of creating an app without coding but now it’s a reality. In this article, we’ll see how to implement a list navigation when creating an app using Appstylo.
Steps To Implement List Navigation
Before you start creating an app make sure that you sign up and log in to Appstylo.
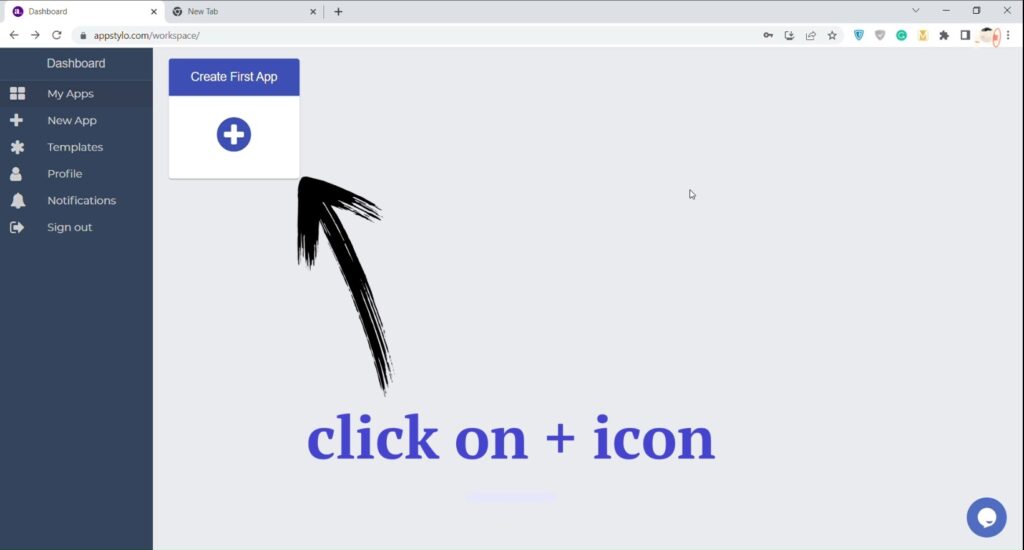
- In the first step, you just have to click on the “+” icon to create the first app.
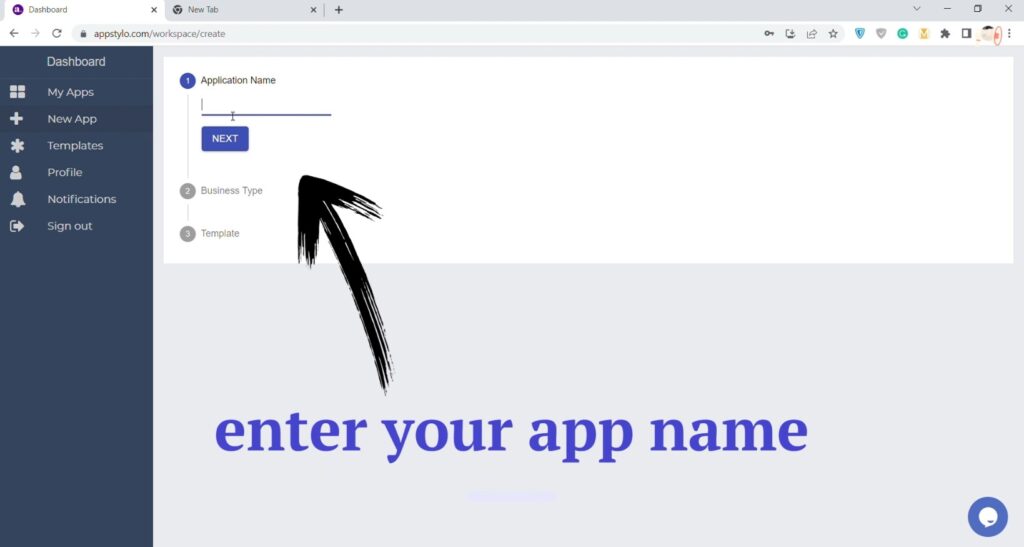
- Now, enter your “Application Name” and then click on the Next button. It can be any name that you want to give your app. For example, Steak House if you are running a steak restaurant.
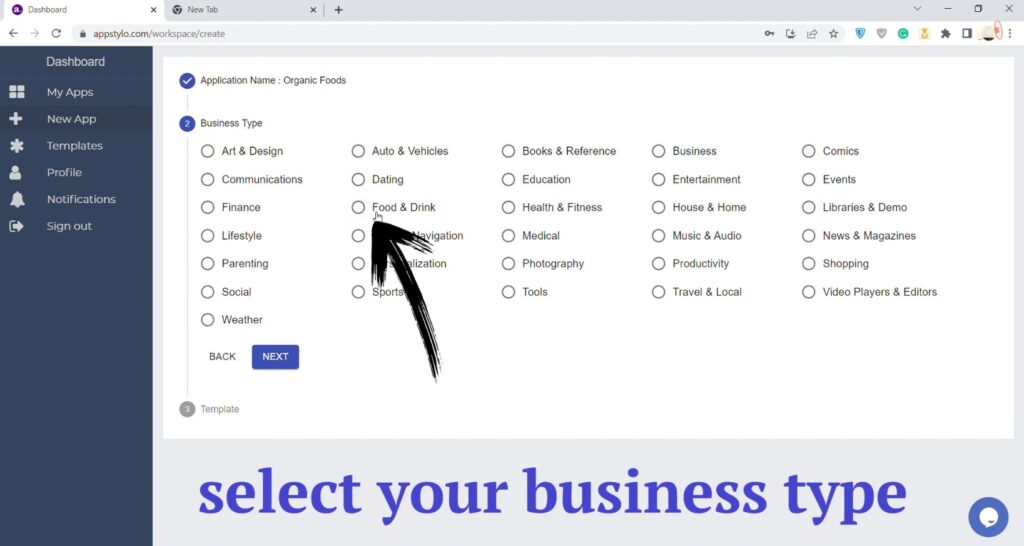
- Then select your “Business Type” and click on Next. Business type can be based on your business niche where you operate like Food & Drinks.
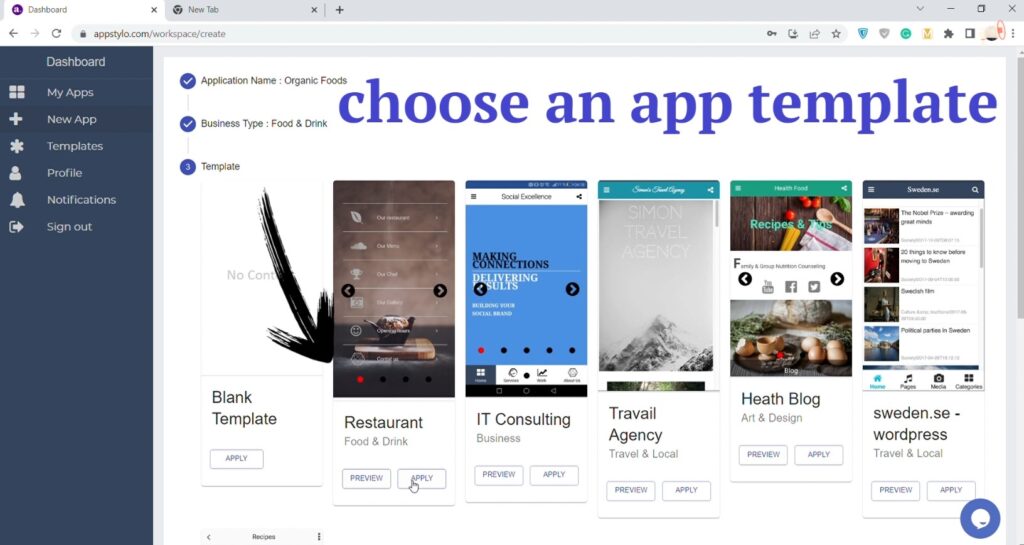
- In the next step, “Choose an App Template” you like by clicking on the Apply button. You’ll find many different options to choose from and you can also choose a blank template to start from scratch.
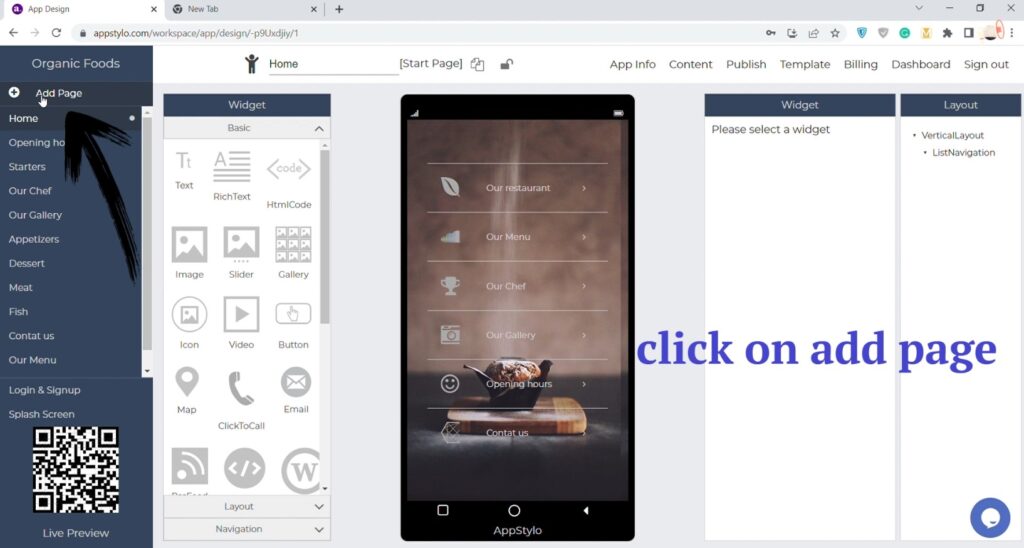
- Now, click on “Add Page” in the top left corner to create a new page.
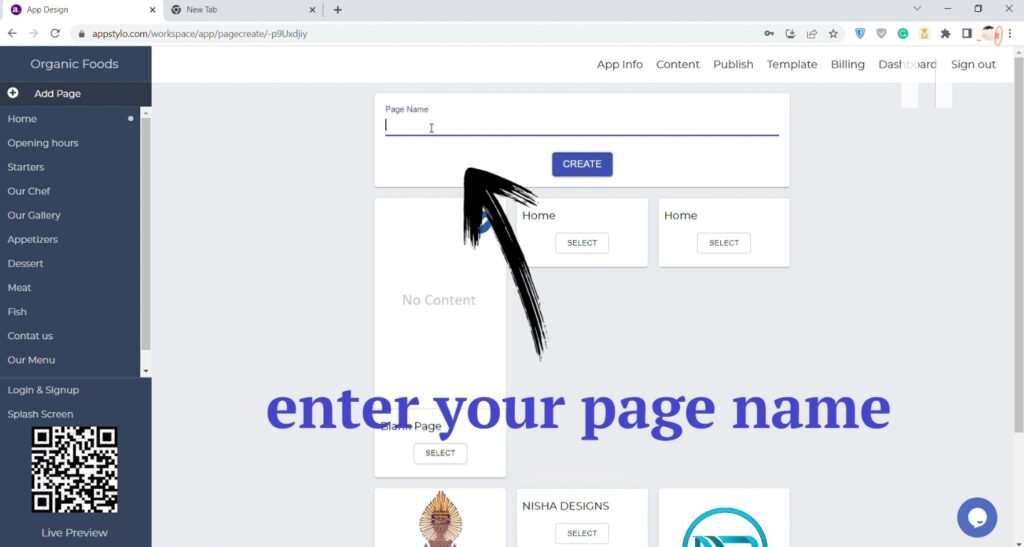
- Then enter your “Page Name” and click on Create.
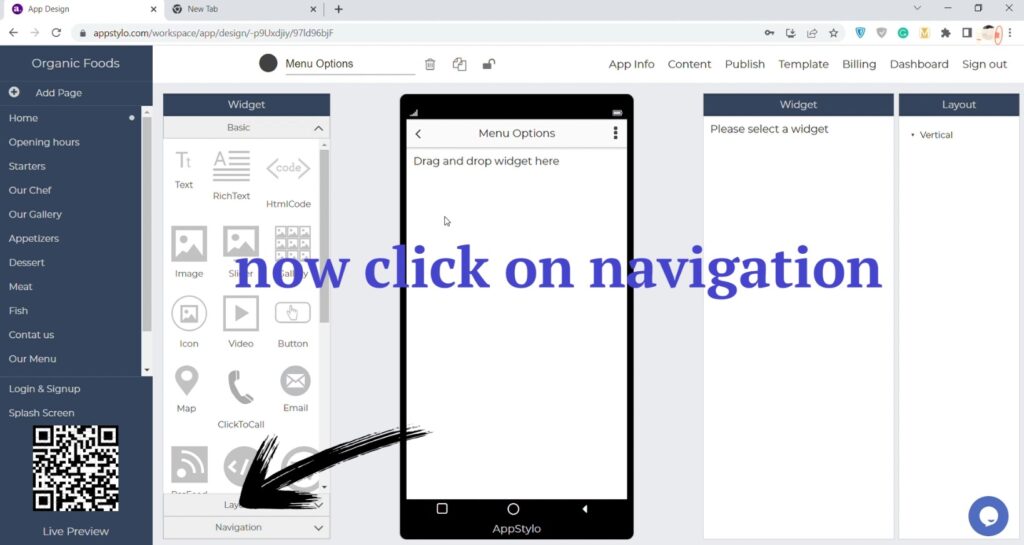
- In the next step click on “Navigation”.
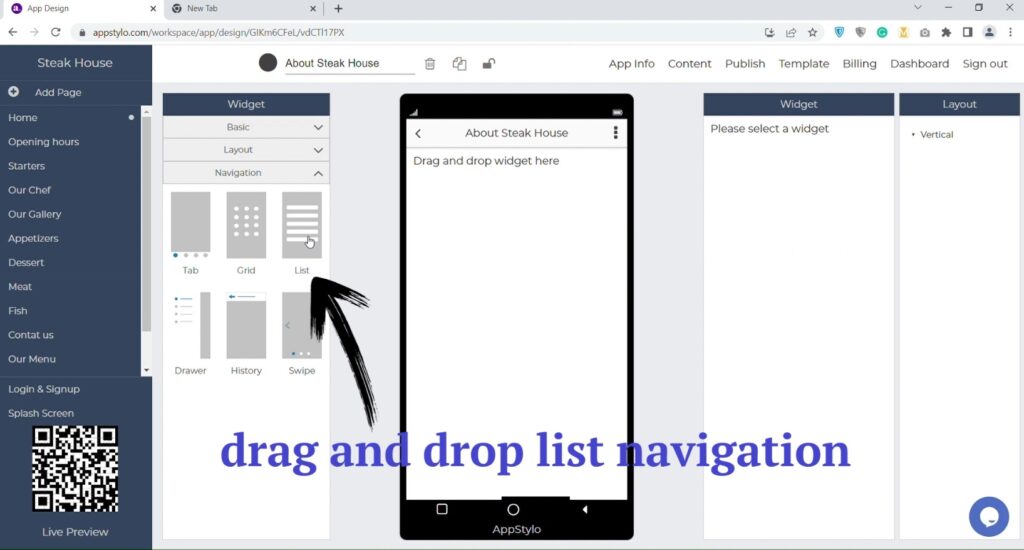
- Drag and drop “List Navigation” on the app screen in the middle.
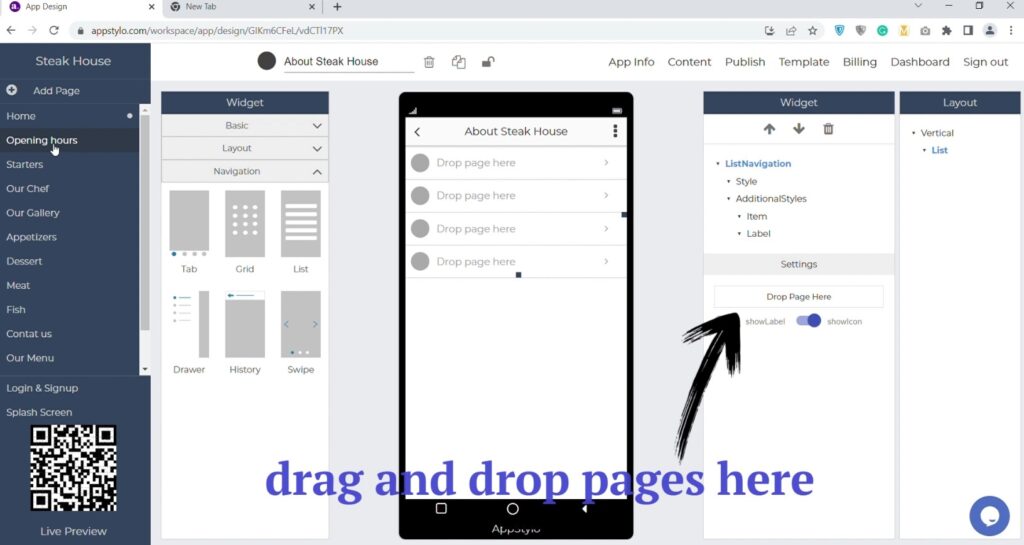
- Finally, “drag and drop pages” on the right side. You can add as many pages as you want.
- Now click on “Vertical” and then on “Style” to add a background image.
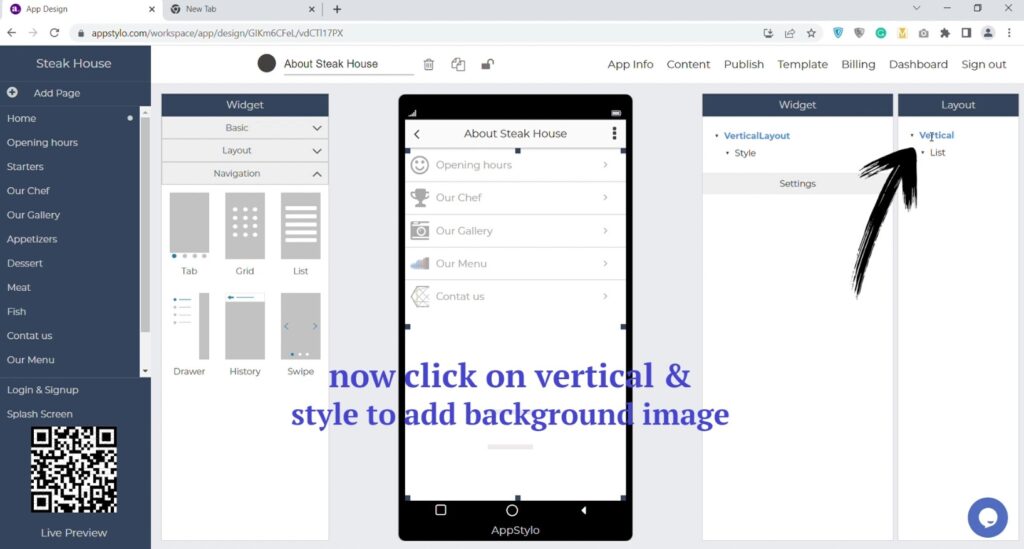
Now your list navigation is ready. You can do further customizations in the app and add widgets as you like.
